fbpx

2022 Basement Waterproofing Cost

Basement Waterproofing Cost In Toronto

The cost depends on the type of waterproofing. The method of installation of the system is selected individually for each object. Therefore, what is the cost to have the basement waterproofed? You can find out only after the master inspects the premises.

The specialist will assess the damage to the foundation, the area where the object is located, the type of soil, the location of groundwater, the climate, and other factors that affect the humidity inside the basement. Also, the amount of necessary materials and additional work is necessarily considered in the basement waterproofing cost. The larger the area of the room and the more complex the landscape, the more expensive the system’s installation will be.

Before the provision of services starts, the master draws up an estimate, and if the price suits the client, he starts work. It is not recommended to save on waterproofing. The microclimate inside the basement and the life of the building depend on it.

Average Basement Waterproofing Interior Vs. Exterior Price In Toronto

The average cost to seal a basement is approximately 1920-6320 US dollars, which is 3-9 dollars per square foot, considering labor and materials. Internal waterproofing is cheaper than external waterproofing since there is no need to install window wells and do excavations. Therefore, the interior basement waterproofing costs approximately 500-1500 US dollars. And the outdoor installation of the system with repair and drainage will cost 10,000 US dollars. An important role is played not only by the area of u200bu200bthe room, but also by its condition. Therefore, to find out what the basement dewatering system cost, leave a request on our company’s website, and we will agree on the day and time of the arrival of a specialist to evaluate the work.

Waterproofing services consist of several stages:

  1. Evaluation of the object.
  2. Development of a system project.
  3. Budgeting.
  4. Preparatory work.
  5. Sealing the surface of the foundation and walls.
  6. Installation of the drainage pump.
  7. Disposal of wastewater from the facility.
  8. Treatment of the foundation with epoxy resin.

If the house has a damp basement, then, regardless of the cost to fix the water in the basement, it is necessary to make waterproofing. Getting inside the foundation through cracks, moisture gradually destroys it, reducing the structure’s life.

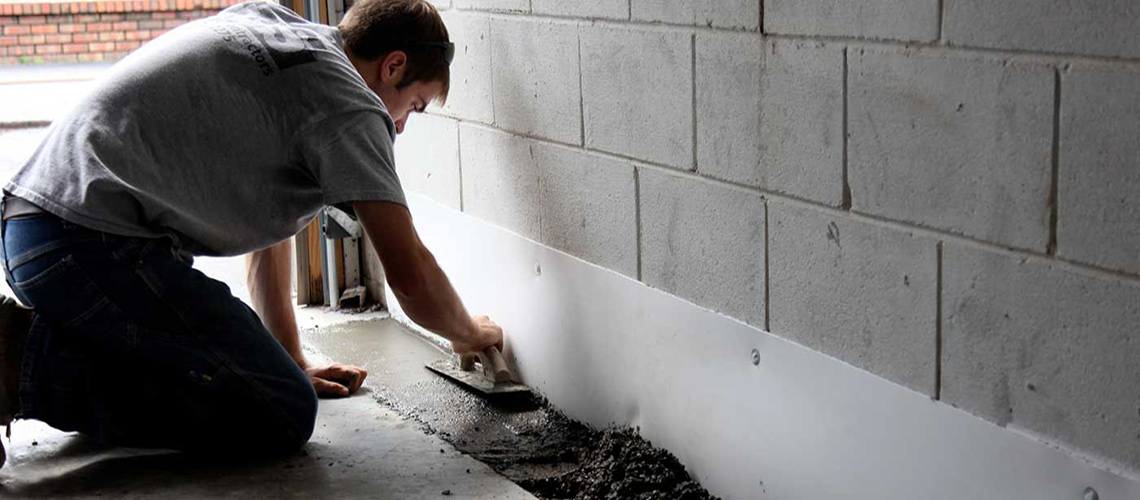
Interior Basement Waterproofing Cost

Unlike external waterproofing, the internal system is carried out indoors. Waterproofing is carried out in several ways:

  • The drainage system is installed under the floor covering.
  • Channels for water drainage are mounted above the floor.
  • The system is installed at the footer level.

Dry basement systems cost includes epoxy, sealant, and waterproof membranes. The method is selected from the features of the basement and its location. Waterproofing basement walls from the inside depends on the materials used and the services of the master. The average price per linear meter is 65 US dollars. Installing a duct above the floor is $30 per foot, and installing the system at footer level is $20-$35. Underfloor waterproofing will average $25-$55 per foot.

Exterior Basement Waterproofing Cost

There are several methods for installing a waterproofing system, and the work’s price depends on the chosen method. Waterproofing is carried out outside the premises. A ditch is dug around the structure’s entire perimeter to the foundation’s depth. Before mounting the membrane, the foundation is washed away from debris and dirt, and cracks are sealed. The Exterior basement waterproofing cost depends on the depth of the ditch and the condition of the foundation and averages 15,000-35,000 US dollars, which is one hundred dollars per foot. Due to the complexity of the work, the cost of waterproofing the basement from the outside is higher than that of external waterproofing.

What Affects The Cost?

Basement sealing cost is affected by additional work:

  1. Eliminating cracks and microcracks on the surface of walls and foundations.
  2. Installation of window wells.
  3. Sealing windows and doors.
  4. Installation of downpipes and gutters.
  5. Installation of drainage.
  6. Cleaning of coatings from paint.

Also, the cost of waterproofing exterior basement walls is affected by the area of the room and its condition. It may be that additional work is required to strengthen the building.

Extra Repairs And Accessories

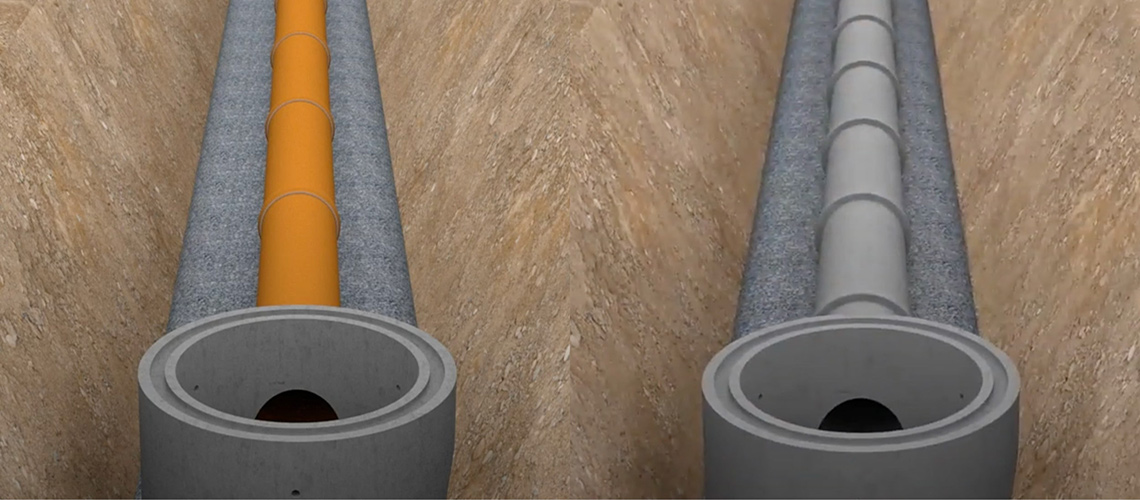
Choosing suitable waterproofing materials and developing a system design is essential. The climate in which the basement is located affects the work plan and the type of waterproofing. If the object is located in places of frequent flooding, for example, in the coastal zone, then a drainage pump will be required to pump out water, which varies from 490 to 1200 US dollars. Installation of polyethylene pipes – from 0.97 – 2.81 dollars per foot. Installation of French drainage ranges from 10-25 US dollars per 1 foot. To increase the budget for crawlspace, waterproofing costs can be leveling walls, installing windows, and installing flooring and ventilation.

Basement Layout And Size

It is best to do waterproofing in a new room, planning the system’s location. If the basement is old, this increases the cost to fix the wet basement due to redevelopment and additional work to eliminate damage. When planning a basement, you need to consider not only the location of the drainage system, but also the purpose of its use. For food storage, the room is equipped with additional shelves. When creating a wine cellar – refrigerated wine cabinets. Accordingly, the area of the object directly depends on its purpose.

Our experts, who have extensive experience in their work, will help to develop a plan correctly. Considering all the nuances, they will help turn a wet basement into a dry and comfortable room you can use as a workshop.

Foundation Repair Or Reinforcement

After inspecting the object’s condition, our master will tell you the average cost of the waterproof basement and whether it is necessary to strengthen the foundation. In new buildings, most often due to shrinkage of the building, foundation repairs are required. For this, specialized cement mortars with water-repellent properties are used. If work is carried out in old buildings that have not been repaired for a long time, it may be necessary to strengthen the foundation. To do this, a moat is dug to the depth of the base of the building along its entire perimeter. A lattice is welded from the reinforcement, and it is poured with concrete after installation. Then a waterproof membrane is mounted, and the rest of the waterproofing work is done.

Labor Cost Basement Waterproofing

The average cost to seal a basement depends on the work done and the materials used. The appraiser of our company carries out the calculation of the job. The average price range for installing a waterproofing system is from 1920 to 6320 US dollars. At the same time, the lowest cost is fixed at around 250 US dollars, and the highest – is 20,000 dollars. Such a price range allows customers with different financial capabilities to use waterproofing services, creating a comfortable microclimate in the basement, making it dry and warm.

Basement Waterproofing Products

Usually, a sealant, roll materials, a membrane, and a bitumen composition are used to waterproof the surface. By type, waterproofing materials can be divided into classes:

  • Polymer.
  • Mineral.
  • Bitumen-polymer.
  • Bituminous.

The cost of materials directly affects the estimate’s pricing when calculating the waterproofing budget.

The type of material is selected based on the method of waterproofing, the customer’s
budget, and the object’s condition and location. Turning to us, you do not have to search for the necessary materials. We will do it for you. Our company cares about its customers and provides a guarantee for the services offered.

How to Waterproof a Basement From Inside Or Outside?

Should I Waterproof My Basement From Inside Or Outside?

Often in basements, you may notice water seepage after heavy rainfall. This phenomenon is caused by cracks in the basement. The problem can be solved with waterproofing. Depending on the basement condition, we are waterproofing basement walls from inside and outside. What method to use will prompt our expert after inspection of the object.

Before we start the work, we calculate an estimate based on the customer’s budget. Our exterior basement waterproofing systems will solve the waterlogging problem, making the room dry and usable.

Signs Your Basement Needs Waterproofing

The main signs that you need waterproofing exterior concrete basement walls include:

  1. Mold and mildew. This is caused by high levels of moisture in your basement. Even if there are no signs of puddles, walls absorb moisture through micro-cracks in the basement.
  2. Paint flaking. The paint is peeling from the damp wall. Pink or black spots appear at the peeling site.
  3. Moisture oozes down the wall. Droplets of water appear on the wall, or the wall feels damp to the touch. Water can enter the wall through the ground or through pipes running under the concrete.
  4. Brown or black rot like a product of wood rotting on the walls. It can spread along the walls because of high humidity.
  5. Water is seeping into the basement due to heavy rainfall or the proximity of groundwater.

If you notice one of the above reasons, you need to urgently fix a wet basement using the services of our masters.

Why Is Your Basement Wet?

If your residential house is situated in a place with frequent floods or a humid climate, you will have a wet basement problem. Only waterproofing outside concrete basement walls can make a difference. Also, if water leaks if the house is located at the foot of a hill, water treatment and a water drainage system development are necessary. Otherwise, after the rain and snow melt, water will accumulate on the site or near the building and penetrate into the basement. It will gradually be creating conditions for the destruction of the building.

Three Common Mistakes Homeowners Make With A Damp Basement

We offer the best interior basement waterproofing system with a guarantee on the work done. The company has been in the market for a long time and has extensive experience in designing and installing systems. People who try to fix water leaks on their own, do not listen to the opinion of experts, and often make mistakes:

  • They use waterproofing paint on the basement wall, not because the foundation has a porous structure, through which water seeps. The paint prevents moisture from seeping into the basement, but water accumulates inside the foundation, leading to its destruction.
  • Bleaching agents are used to eliminating mold on the walls. This material performs well as a sterilizing agent for non-porous material.
  • Waterproofing is often confused with drainage. If your basement has a drain, the system performs a preventive measure in case of severe flooding, and crawlspace waterproofing prevents moisture from entering the foundation.

If your cellar is leaking, then contact our company. You will see firsthand what is the best interior basement waterproofing made by the hands of experienced specialists, taking into account modern technologies.

Basement Waterproofing Methods

Properly waterproofing exterior basement walls guarantee the creation of a comfortable microclimate indoors without water leakage. Depending on the building, climate and landscape, the specialists may choose internal or external waterproofing.

Interior Waterproofing Your Basement Walls And Basement Floor

The foundation of any building is its basement. With time it begins to sag, forming microcracks and cracks through which water leaks. Properly waterproofing basement walls from the outside will help to avoid moisture seepage into the building. If you decide to waterproof your walls, follow the technology, carrying out the work step by step.

Step 1: Clean The Area

First, you should clean all dirt from the surface where the interior basement waterproofing will be done. You can remove paint with a tool: a metal brush, a scraper, a sandblaster.

After removing the coating, wash all the walls well from dust and paint residue, using lukewarm water with a diluted soap solution or dish gel. Afterward, dilute the bleach in water and rinse the surface with the solute. Allow the walls to dry thoroughly.

Step 2: Plug Holes

Apply hydraulic grout and work it all over your walls. This will seal any microcracks that might allow moisture to seep through. Apply the mortar to the wall with a spatula. This is to make sure that the interior waterproofing basement walls are watertight.

Step 3: Fill Cracks

If cracks are left after the surfaces have been treated, fill them with filler. We recommend Masonry Crack Filler for good adhesion and resistance to moisture.

Step 4: Seal Openings

The best way to waterproof interior basement walls is to seal doors, windows, and window wells. Use Lexel Sealant or Big Stretch Sealant. They do not let moisture through, are flexible, easy to apply and cure quickly.

Step 5: Apply Waterproof Coating

After all the previous steps, you can waterproof with DRYLOK Clear Masonry Waterproofer. DRYLOK Clear Masonry Waterproofer is available in grey or white. Used on walls only. It can be applied with a roller or nylon brush in several layers.

Waterproofing From The Outside

To save money on masonry services, diy basement waterproofing from the outside is possible with modern materials and bitumen impregnation. Waterproofing is suitable for all types of foundations. The system consists of drains and gutters, which divert water from the foundation, as well as a special impregnation applied to the surface.

Also, external waterproofing of the basement may include the installation of a window well with a waterproofing membrane and the drainage pipes installation.

Remember, outdoor basement waterproofing helps prolong the life of the building by preventing it from deteriorating due to moisture.

Basement Waterproofing Tips

For the best basement waterproofing, you can contact a professional who will do the job quickly and efficiently. To reduce the risk of basement standing water flooding and to eliminate the damp and musty smell inside your basement, don’t forget to ventilate the room and seal windows and doors.

Buy A Dehumidifier

We advise you to buy a dehumidifier in addition to waterproofing the surface. If you want to reduce humidity in your basement and prevent condensation and mold from spreading. Choose a dehumidifier plugged in so that it automatically drains off the humidity as soon as it becomes too high.

Choose Waterproof Carpeting Materials

If your basement is humid, it is bound to get moldy. If you have made wet basement remediation, it is advisable to use carpeting that does not absorb moisture. Put a waterproof carpet on the floor to create a buffer between the basement and the carpeting.

Apply Waterproof Sealant To Walls And Floor

The best way to waterproof the basement is to apply a sealant to the floor and wall surfaces. Sealing is done with a special cement mortar that penetrates deep into the pores of the surface materials. After that, the walls can be painted in the desired color.

Keep Wood Surfaces And Water Separate

If the basement walls have been in contact with water for a long time, dry rot can appear on the floorboards and support beams. The original source must be eliminated to prevent it from spreading across the surface. Locate all wood shelves away from pipes and floors so that items with condensation do not come into contact with it.

Look For Outdoor Issues

The spread of mold and rot on basement walls is often caused by leaking pipes under the house foundation. So before you start the works, you should check if the pipes are in good condition.

Turn To The Professionals

To fix the water in the basement, contact the professionals at our company. We are experienced, licensed, and insured for waterproofing services. Working in the market for more than a year, we know how to make a waterproofing system correctly, focusing on the peculiarities of the climate, type of soil, the features of the building, and other factors.

French drainage: what it is, how it works and how it is installed

French drains around the home are used to collect and divert groundwater, which can prevent various problems. Presented systems are often installed near the house to keep the basement or basement dry, but they can also be installed in wet lawn areas along the driveway. Building a french drain around the house is necessary to create a free-draining drain that can collect groundwater and redirect it to an established discharge point. 

If you want to create a french drain in front of your house, you’ll need our guide. In this article, we will break down all the system’s features, what gives its installation, when it is not suitable and how to do everything competently. 

How to install French drainage

French drain in the house is an underground pipe or trench where water is collected and sent to a special place for drainage. With this system, you can solve the problem of water accumulation, which can damage the foundation of the building. 

Installing a french drain around your house is required in the following situations:

  • water is constantly accumulating around the base of the building;
  • water does not run off from a hard surface to drain correctly (for example, rainwater will not run down the driveway);
  • water flowing down the slope creates considerable puddles in the yard, which harms your landscaping and creates certain inconveniences.

From the outside, the french drainage system for the yard looks like a drainage ditch in the rock. If approached correctly, it will fit perfectly into the site’s landscape design. A drainage pipe is installed in the gravel at a certain angle, so the water flows to the right place without harming the foundation or site. Install the submitted system on its territory so that the open end of the Treba drains water to the downward slope.

All components of the presented system are made so that water can quickly drain without accumulating in the trench. It is carried over stone or gravel through special holes in a perforated pipe. Wrapping landscape fabric around the pipe allows water to pass through and prevents plants and other things from clogging the holes. With the pipe, the water goes to a drainage area in the yard or goes straight to the sewer.

The advantages of installing a French system: why it is worth putting in

Underground french drain deals with the fact that it drains water from ground level, while gutters collect precipitation when it runs off the roof of the house. It is the best solution for a wet basement or foundation that experiences hydrostatic pressure, causing water to seep in constantly. The system presented allows water to be redirected away from the house. If the water still penetrates the basement, an interior french drain is installed – a trench is cut into the basement slab around the perimeter of the basement, a pipe is installed there, and a pump is installed to divert the water.

French drain yard installation has several advantages:

  • a collection of unwanted surface water, which prevents flooding of the patio, yard area, and driveway;
  • drainage of groundwater, drying the foundation and lawn;
  • the system can be added after the construction of the house;
  • almost no maintenance.

You need a french drain installed if your basement is constantly moist and damp, and fungus or mould has appeared, which are detrimental to the house’s condition and create particular difficulties for tenants.

In what situations is it not worth putting a French drainage

Only some sites can have a french drain between houses. It is not a one-size-fits-all solution to all drainage problems. The presented system, just like the gutters on the roof of the house, is designed for the main task – the diversion of water in a particular place where it will not harm the condition of the structure or site. Therefore, a particular slope for unimpeded drainage of water should be on the site. If not, the ditch will collect water in itself, which will only worsen the problem.

During the planning of the installation, it is undoubtedly worth determining where precisely the water will be drained. It can be:

  • street;
  • city sewer;
  • a particular area on the site (next to the tree, into the garden, etc.).

In no case should the water not flow into the neighbour’s yard. If you do not have a suitable place for the discharge of water, then it is not suitable for your area.

What materials will be needed for installation

The long french drain requires the use of special perforated pipes. The perforation comes in 2 types: slotted or circular. The first option is preferred because it does not allow a large amount of soil to get into the pipe. To install this system, it is worth using the following materials and tools:

  1. drainage pipe (most often take the product 6 feet in length, but you can also take more if necessary);
  2. landscape fabric – a roll;
  3. bright spray paint;
  4. shovel;
  5. landscape stones;
  6. sand;
  7. gravel;
  8. topsoil;
  9. lawn.

You can buy suitable French drainage pipes with or without a filter in construction stores for further installation. 

The process of installing French drainage: the main steps

Installing french drain around the house – quite a feasible process, which you can learn. This work can be done independently, using suitable tools and unique materials. Before installing a french drain in the yard, you should first understand whether you need permission from the municipality for this project. Most often, communities allow these outdoor drainage systems, but there are also specific areas near wetlands and other sensitive areas where it cannot be done.

No. 1: Find a suitable area on the property to redirect excess water

Installing a french drain in the backyard begins with finding a suitable area to divert the water. It is required to determine a route with a slight slope, at least 1 meter from the house’s walls or fences, with no obstacles. Use spray paint to determine the drainage route.

No. 2: Dig a trench and fill it with gravel

Whether you’re installing french drains for gutters or other systems, they all work on the same principle. When you’ve outlined the trench with paint, take a shovel in your hands and start creating a trench with a slope in the direction where the water should be diverted. The optimum is 1 inch for every 8 feet of route. To determine a clear slope, you can use a level string tied between stakes, measuring the distance from the reference point. The depth should be 18 to 24 inches.

No. 3: Lay a lining of fabric

Put landscape fabric on top of the gravel throughout the trench, leaving 10 inches of fabric on each side. This material will help prevent weeds from growing.

No. 4: Install a drainage pipe

Creating a linear french drain is definitely worth installing a pipe. In this situation, you can use complex PVC products with drilled holes or a special flexible drainage pipe with slots. PVC products will last longer because they can be cleaned with a sanitary snake in the case of clogging. But the advantage of a flexible pipe is that it is cheaper and a little easier to work with.

After installing the pipe, some gravel should be poured on top of it. The material should cover the pipe.

No. 5: Properly stack leftover fabric

Fold the excess fabric over the gravel, creating an overlap at the ends. This way, it will be possible to protect the drainage pipe from the penetration of soil and plant roots.

No. 6: Backfill the trench

Finally, the trench should be backfilled with gravel, smoothing it out. Another option is to backfill the gravel within a few inches of the ground level. Then you can backfill the soil to level the surface. 

Expert tips on how to properly install a french drain

If your home requires a french drain system and you want to install it yourself, it doesn’t hurt to read some professional advice before the process:

  • the trench should be the right size – the best option is at least 2 feet wide and up to 6 feet deep (if you are digging it for a basement) or no deeper than 2 feet (if you are creating a slab home drainage at ground level);
  • create the proper slope – the pipe should be sloped from a higher starting point to a lower one at the end so that the water flows under gravity. The slope should always be made away from the house;
  • The pipe should be backfilled with gravel, a layer that should be at least 12 inches.

Conclusion

A french drain to divert water is self-explanatory and relatively easy to install if you get it right. Following the above steps, you can implement the presented project
with your own hands. But in this situation, it also does not hurt to take some helpers to help you with the installation.

Features and types of drainage systems: indoor and outdoor

Is your basement constantly damp, with high humidity and mould? In this situation, it is worth considering making basement water drainage for proper waterproofing of the room. You should pay attention to this problem because a damp and wet basement can create a lot of inconvenience. That is where fungus and mould can spread throughout the house, which is very bad. In any home, the basement can leak, so it’s worth taking care of proper drainage beforehand.

Use our article to find the best basement drainage system depending on your preferences and the features of your home. 

Interior Vs. exterior drainage systems: a breakdown by parameters

Drainage in the basement can be carried out with internal or external systems. Each of them has its features, advantages and disadvantages. We propose to consider them depending on several parameters.

Difficulty of installation

The external drainage system for the basement is mounted on the perimeter of the entire house, so contractors will have to dig a trench around the foundation with an excavator. Before this work is done, you must remove any excess vegetation on the site and other obstructions to the excavation. After the trench is excavated, all the soil will be placed around the house’s foundation. Then the system is installed, and the soil is backfilled. After that, the landscaping will have to be redesigned, and everything will be back in place.

An interior basement drainage system has no such disadvantage. It can be installed in just 1-2 days, and you have to go over the floor with a jackhammer to place the drainage system on the knocked-out clean stone. Real professionals can complete everything with a minimum amount of dust. Once the pipes are laid, they are appropriately cemented so the system is completely hidden from view. At the same time, the landscape and foundation remain entirely intact. 

Clogging

Outdoor cavity drainage system basement waterproofing loses out on this issue. If the house is not on a slope and there is enough space between your building and the neighbour’s to dig a gravity drain, the system will not have a regular opportunity to drain the collected water to drain it down the slope. The system will only work correctly if the water drains down naturally. If you connect the drain to a storm drain or create a dry well, you will also have problems in this situation – the system needs to be installed much lower in level from the drain outlet line. At the same time, it is worth calculating the collection tank clearly for the volume of water discharged. In some situations, you can add a drain pump.

Maintenance Costs

An external system is quite expensive and requires special maintenance. This system is already provided in your home and was installed during construction. If it wasn’t, it’s worth worrying about a new one. In any case, it requires special maintenance. In this situation, excavation work is also required again. This system is prone to frequent clogging. Quite often, when the outdoor system completely fails, it must be replaced with a new one. As for the price, it will cost much more than the internal one – about two times. 

Inside basement drainage systems can boast excellent economics and low operating costs. The installation of this system is not so destructive, and the soil can be restored after backfilling, so there is no need to spend money on excavation work and pay more landscapers. The system is also much easier to maintain. This system is excellent for long-term or short-term solutions, and its installation cost is 50% cheaper than external drainage. In addition, indoor systems are much more affordable to maintain and have a much longer lifespan.

Exterior basement drainage systems

The exterior basement drainage system is effective when you want to block all water sources in the house – gutter extensions, clogged gutters and leaks due to heavy rainfall. Exterior basement drainage works on the principle of the French system – it allows you to redirect groundwater even before it gets close to the structure’s foundation. The basement exterior drainage system protects the basement walls from collapse.

Mounting exterior drainage plates is done at a relatively shallow depth to effectively prevent the penetration of rainwater and other precipitation to the basement wall. In this situation, mounted special perforated pipes with a coating of gravel – special drains. But this system also has specific pros and cons.

Advantages

The presented drainage of the basement allows for minimizing the hydrostatic pressure of groundwater on the foundation. As a result, you can put an external waterproofing membrane, which is quite effective when laying a stone foundation. While installing this system, you can continue to operate the basement. 

Disadvantages

The only disadvantage is that an exterior house basement drainage system requires excavation work to install the drain, which can be messy and cost a pretty penny. In this situation, a perimeter trench is dug around the entire house. The exterior can be significantly ruined during installation, and landscaping will need to be done again.

Interior drainage tile systems

Interior basement water drainage systems involve the installation of perforated pipes around the perimeter of the floor inside the foundation and along the floor, which will direct water to the drainage pump for efficient drainage. Flushed gravel is placed around these pipes and is also covered with a layer of filter paper. 

Advantages

Interior basement drainage enables efficient drainage of rising groundwater, minimizing external hydrostatic pressure and preventing deterioration of concrete walls. No additional hydrostatic solutions are needed during the installation of this system, as well as no excavation work. Your landscaping around the house will remain completely intact. Install interior basement drainage channel can be installed at any time of the year. In addition, an undoubted advantage is lower cost compared to an external drainage system.

Disadvantages

This basement cavity drainage system is not appropriate for a ready-made room since, during the installation, some layers of concrete will have to be removed. During the works, the basement will be entirely closed for use. In addition, the option presented is not suitable for a stone or brick foundation of the house. If you do not install an exterior sealant, stone masonry can also leak water.

Internal drainage system: features, benefits and price

The basement in the house should always be kept as dry as possible. To prevent groundwater from seeping into the foundation and to minimize the likelihood of detrimental effects on the property, you need to use an internal drainage installation to protect the house from water. Previously, only exterior drainage systems were used to solve this problem. Now the latest modern developments offer a more effective way to eliminate the damaging effects of water on the foundation of the house – the interior perimeter drainage system. With the help of this innovative solution, it is possible to protect your house from the negative impact of groundwater, prolonging the service life of the building.

Why the water table rises around the foundation: the main reasons

Suppose your foundation is always under constant hydrostatic external pressure as a result of the fact that groundwater is at a reasonably high level. In that case, it is worth taking care of the interiorr drainage system. Determining the need for this system is relatively easy – in areas where the floor and walls meet, water may appear, water seeps periodically from cracks in the floor, and the basement is constantly damp. Around the foundation can increase the water table due to the following reasons:

  • lack of drainage around the perimeter of the foundation of the house, clogging of the system or a violation of its design;
  • surface water is poorly drained;
  • there is always plenty of water around the foundation walls due to poor roof drainage;
  • sharp temperature fluctuations.

Determining the main reason why groundwater rises around the foundation is quite tricky. That is because the problem appears exactly on the outer wall of the building foundation or under the floor, which is not visible. It is impossible to conduct a meaningful, comprehensive inspection of this area.

How to protect the basement and living space with internal waterproofing drainage

Sharp fluctuations in temperature often accompany the change in weather seasons. Structures can be exposed to a variety of aggressive weather factors:

  • rain;
  • frost;
  • drought;
  • thaw.

The most vulnerable area of a house is its foundation. It is the one that is most damaged by water. If there is significant hydrostatic pressure from the outside, water can seep through the foundation – most often, moisture can be seen in the joints between the wall and the basement floor or in cracks. In this situation, it is worth worrying about the proper protection of the house. The best option would be an interior perimeter drainage system. 

The advantages of installing an interior drainage system: Why should you install one?

Interior water drainage system has many advantages compared to traditional methods of protecting the foundation from groundwater:

  • Installation of the system makes it possible to avoid external works or demolition of part of the foundation walls. Everything remains intact – the landscape, the house’s plaster, and the pool on the site. Specialists won’t have to excavate to get to the surface of the basement walls.
  • A drainage system can reduce moisture, which will protect the basement surface from mould.
  • The drainage system has a rubber seal, which allows the moisture to drain away from the wall surface effectively.
  • A vapour barrier can also be installed in conjunction with this system, which will significantly reduce moisture in the basement.
  • During installation, the system is connected to the dewatering pumps. As a result, it is possible to quickly and efficiently remove water from the building.

These are only some of the favourable properties of the system. You can notice the effect of the drainage installation in just a few days when you get a completely dry basement with average humidity.

The principle of operation of the internal drainage system

Basement waterproofing with perimeter drainage installation is a modern, reliable and effective solution for almost any building. The system is installed inside the basement to a depth of about 1 foot and is close to the base of the building. The drainage system is installed exactly where groundwater is pushed into the basement by hydrostatic pressure. With a modern, effective system, it is possible to intercept the ejected water so that it does not have time to seep into the basement itself. The system directs the water under the concrete floor through perforated PVC pipes connected to a drainage pump. The latter is responsible for pumping the water to the sewage system for safe drainage.

In addition, installation of the system can be carried out at any time of the year. Also worth noting is the least invasive method of installation. For example, your landscaping remains completely intact. This property is often appreciated by homeowners because, in this way, you can save a lot of money on additional costs for excavation work and the arrangement of the site in the proper form.

This drainage works much better compared to traditional options. It has more compact dimensions, so the installation is much easier. The system turns out to be slightly higher, which creates the safest distance from the basement slab level to the water. Why does it work this way? It’s all about the fact that in this situation, the interior water drainage system operates at the groundwater level around the building and reduces the hydrostatic pressure. If the latter is too high, the water will come through joints or cracks in the basement. It is how water appears in the foundation.

How much does a drainage system cost?

Interior drainage system cost depends on a variety of factors. If we consider the average cost, the drainage system will generally cost $1,000 to $1,400. If you want to install an underground drainage system, it costs 150-350 dollars for one drainpipe. As for the interior system for the basement perimeter, it will cost a little more – its price ranges from 4000-12000 dollars.

The final cost is calculated individually for each object, based on the house’s parameters and clients’ wishes. The price depends on various parameters: the chosen type of drainage system, the house’s size, the work’s complexity and others. Consult the rates directly with the contractor.