fbpx

How to properly waterproof the basement?

Poor sealing outside basement walls can cause many problems. Water seepage cause significant damage to the foundation. To prevent serious problems by ensuring your basement is completely dry, you must waterproof it from the outside. Ideally, this process should be done while the building is still under construction. Still, at the same time, the sealing outside of the basement walls could be done at any convenient moment. It could be done in any monolithic concrete basement or block wall. 

How to find the cause of high humidity in the basement

Suppose you want to check the moisture level in your basement and the waterproofing quality. In that case, it sticks a 1 square foot piece of aluminum foil on the inside of your basement wall and leave it for 24 hours.

Suppose condensation appears on the outer surface of the piece of foil. It indicates that the humidity in the basement is high. Here, you can use a portable household dehumidifier or correct the problem with a humidification system without using waterproofing materials. 

Suppose condensation appears inside the foil (near the wall). The ground around the foundation may be naturally damp due to a high groundwater table or an inadequate soil drainage system. Then, basement waterproofing is indicated. The best way to solve the problem is to waterproof the exterior walls. 

3 main types of waterproofing inside the basement

Before the best exterior basement waterproofing, it is worth paying attention to the interior. A variety of materials can be used. But the most effective should include the following 3 types. 

Waterproofing coatings for concrete

Externally, the thick coating looks like cement. It perfectly adheres to the brick and concrete wall after drying. Spread the mortar with a special tampico bristle brush. The waterproofing concrete coating can not be applied to a previously painted surface. The cost of a 5-gallon bucket of the compound is $60. 

Silicate Sealants

Silicate-based sealants could also be called sealants. They are applied only to walls without paint or sealant. The composition is quickly absorbed and reacts with components of brick or concrete. The result is a hard surface with excellent water resistance. The sealant penetrates deeply into the surface, so it does not peel off. The sealant is painted on top (first check the point on the label of the composition). Silicate-based sealants should be applied with a brush, roller or sprayer. One gallon of sealant costs $65. This is enough to cover a surface of 175-250 square feet in 1 coat. But keep in mind that you must apply the sealer in 2 coats minimum. 

Acrylic Paint

The composition is very similar to simple wall paint. But you need to apply the paint for waterproofing much denser. Standard paint uses about 1 gallon per 300 square feet of the surface. While waterproofing, acrylic paint is applied with a brush, roller or sprayer at about 1 gallon per 75 square feet. Waterproof paint is easy to use on your own. At the same time, the compound can be applied to an already painted surface, or you can topcoat the paint after it has dried. The cost of 1 gallon of paint is $37. 

How to properly do exterior waterproofing of the basement: the main steps

Suppose you are looking for the best way to waterproof exterior basement walls. In that case, we offer you step-by-step instructions from real professionals on properly performing these works. The task will be able to cope with even a non-professional without years of experience. You only need to follow the instructions clearly. 

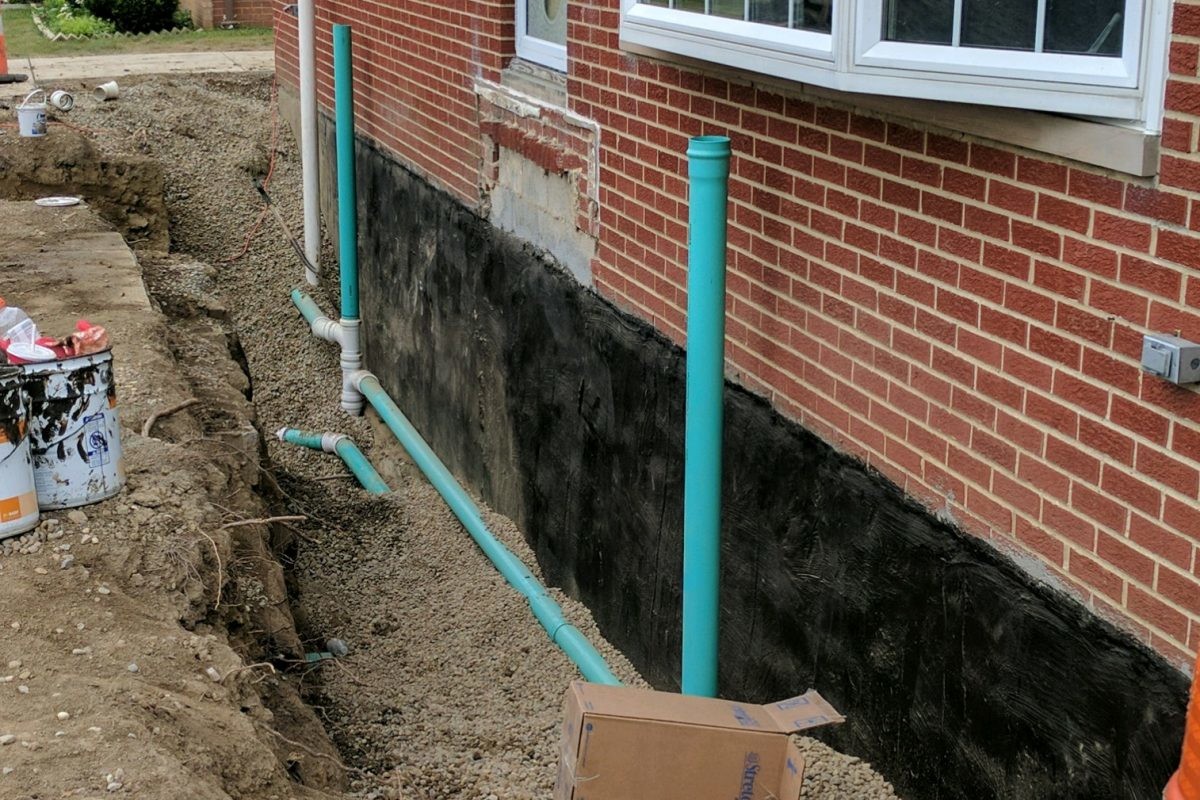
No. 1: Dig a trench around the perimeter of the entire foundation

First, you should dig a trench along the whole perimeter of the house. Continue digging to the base of the concrete foundation to gain full access to the outside of the basement. Sometimes the process can only do by dismantling decking and removing concrete sidewalks, walkways and landscaping. 

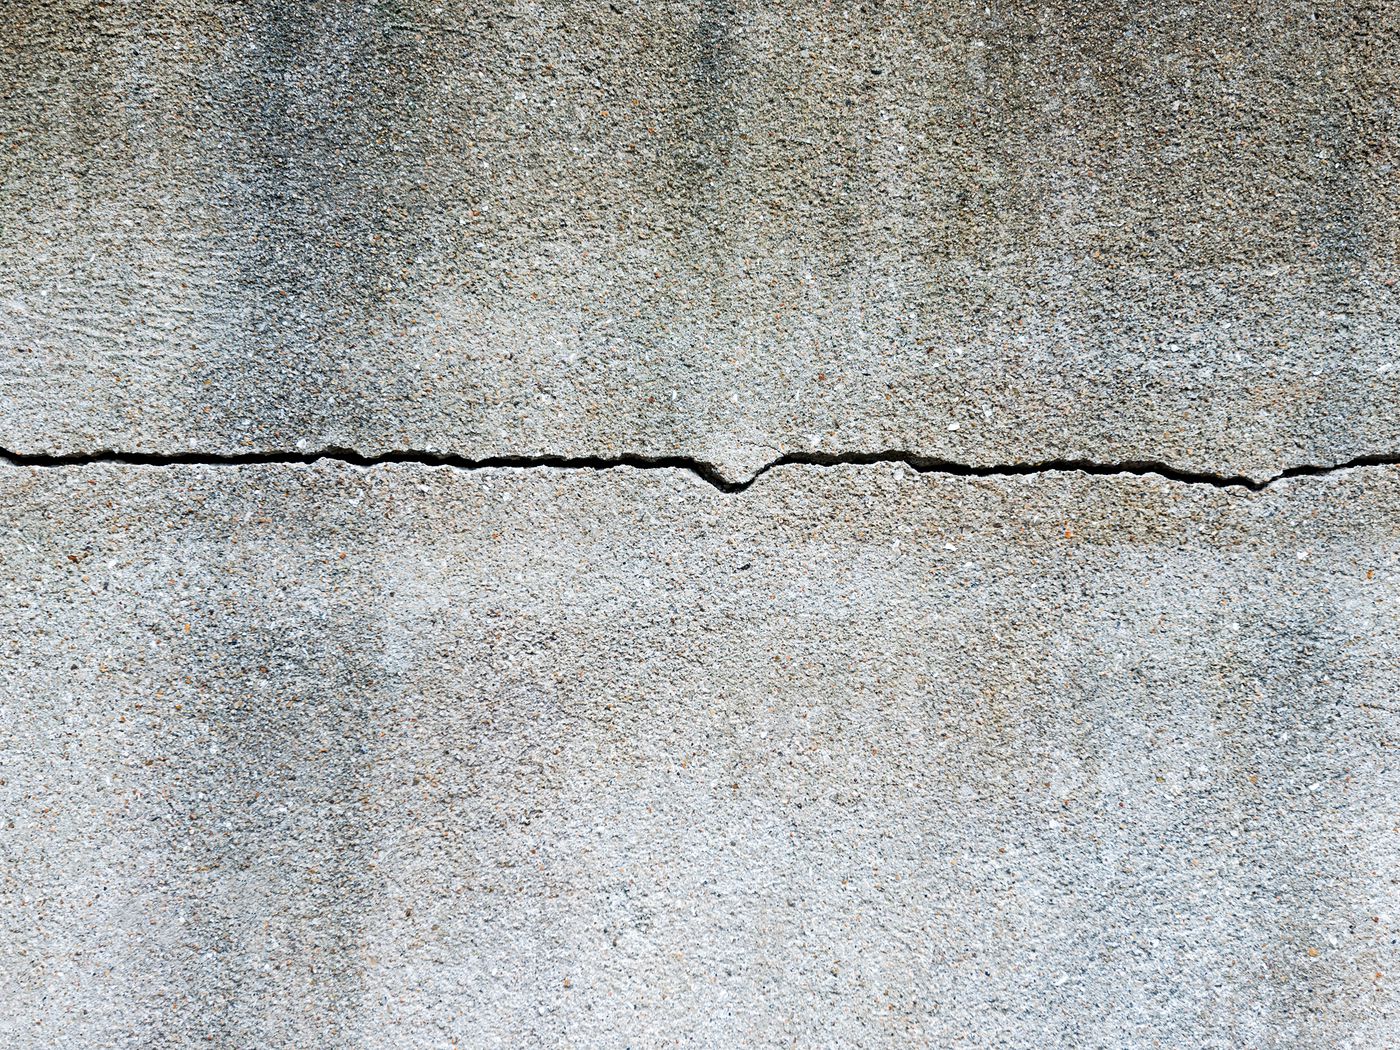
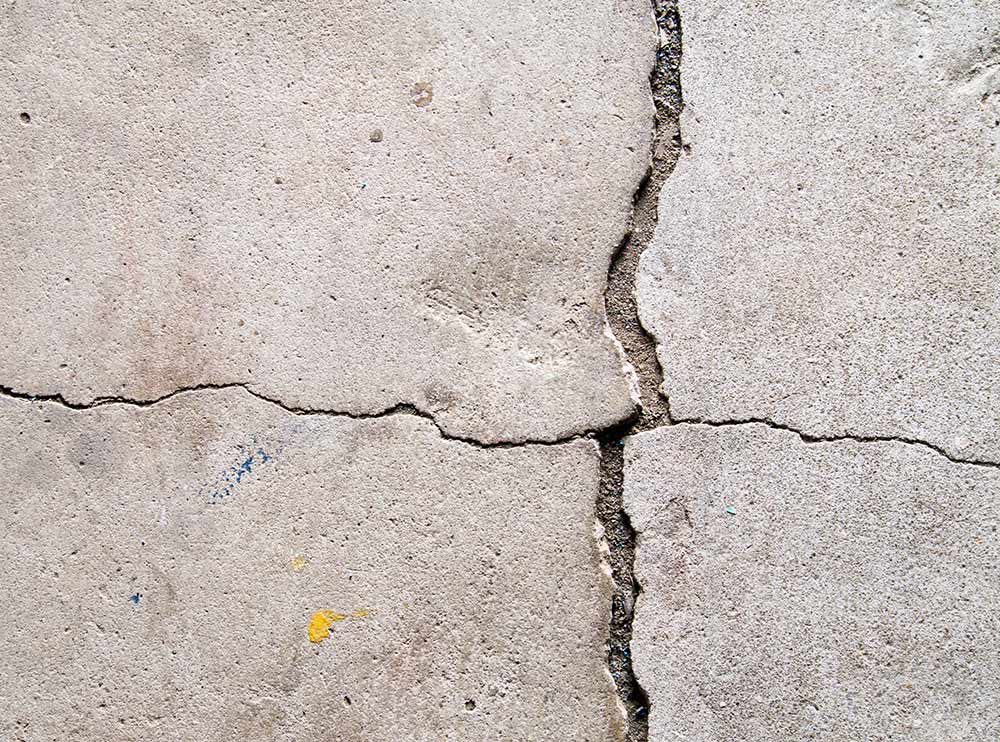
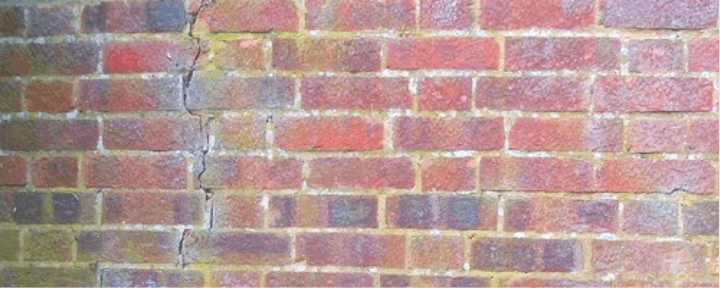
No. 2: Inspect the foundation for cracks and seal them

It should be opened up as much as possible to get a complete picture of the foundation’s condition. After excavation, you can inspect the exterior walls for cracks and other defects. These factors lead to high humidity inside the basement, and water begins to penetrate there. If flaws are detected, it is worth eliminating them to ensure complete water tightness. For quality sealing cracks and other defects, it is best to use epoxy or polyurethane – these are the best options for concrete walls. Presented materials prevent the free flow of water between the interior and exterior parts of the foundation of the building. 

No. 3: On the outside of the foundation, attach a waterproofing membrane

Concrete, used to build foundations, is a relatively porous material. Because of this, even if it does not show cracks on its surface, it could still let water and moisture through if the adjacent soil has a high water table. To prevent moisture from penetrating the concrete surface of the foundation, you need to attach a special waterproofing membrane on the outside. 

The waterproofing of the house’s foundation could be carried out using different types of membranes. They may be on a synthetic rubber base (elastomeric membranes) or cellular, which consist of two layers, between which there are air pockets. Due to the latter, it is possible to minimize water pressure on the house’s base and create sure drainage. The selected membrane should cover the entire base of the building for maximum effectiveness. It should also protrude slightly above ground level.

No. 4: Install a drainage mat

Next, you should create a drainage mat with recesses. The material allows you to create an air gap between the wall and yourself so that moisture can easily escape into the drain. The drainage mat should be cut strictly according to the depth of the foundation. It will also help minimize lateral ground pressure on the foundation. 

No. 5: Finish the French drainage installation process

The next step is to put in the French drainage. You could use a 4-inch pipe, put it at the house’s base, and lower the water level below the basement. In addition, an excellent result will be achieved by installing maintenance holes for cleaning. This will make it much easier to access maintenance. 

No. 6: Backfill the trench

Before backfilling the trench, it is definitely worth checking the condition of the building base drainage. Once all work has been completed, you can backfill the trench with gravel and install the French gutter to create quality waterproofing. The poured gravel should be 18 inches from the soil level for earthen areas and 4 inches from the ground level, where the cement will be poured. 

What mistakes should not be made

To ensure that your seal basement from outside meets all standards and provides a comfortable living environment in your home, there are some things you should avoid:

  • Do not use resin in this process. Over time, the material becomes brittle, so it cracks, and all the work will go to waste. 
  • Do not use plastic or materials similar to it. Otherwise, the selected material delaminate from the walls, and moisture will begin penetrating into the basement.
  • Do not backfill the trench with limestone. The material will only reduce drainage efficiency or clog it. Gravel is great for this task. 

Suppose you want to find the best way to waterproof the basement from the outside and conduct quality work with minimal effort. In that case, you should turn to real professionals. They will examine the object, offer the best solution, and cope with the task in the specified time. 

Leak and crack in concrete

Concrete can last for hundreds of years, but small cracks, holes and extensive gaps may appear on the surface at some point. Suppose your patio, foundation walls, sidewalk or driveway have begun to age and have defects in their surface. In that case, you need quality fixing cracks in concrete. Even though you need professional help in some situations, almost anyone can handle minor defects.

What materials are used to fill or seal control joints in poured concrete slabs

Waterproofing cracks in concrete are carried out using a variety of materials. The best materials for this task are:

  • ready-made plastic strips of control joints and other materials;
  • sealant (most often polyurethane);
  • semi-rigid crack filler based on epoxy resin;
  • hydraulic cement;
  • sealant based on polyurea.

When selecting the optimal material, it is worth making sure that it can bind to the sides of the defect, remaining flexible in any humidity and temperature conditions.

How to Prepare a Concrete Crack for Caulking

Concrete crack leak repair always begins with proper preparation of the work front. Typical preparation includes several steps:

  1. cleaning the crack – you need to altogether remove debris. For this, it is best to use a vacuum cleaner;
  2. preparation of the sealant – read the label of the composition and act under the manufacturer’s instructions;
  3. install a support rod if you are sealing an epoxy sealant expansion joint – you need to put a flexible filler in the form of a support rod to hold the sealant in the joint when it cures;
  4. apply sand as a crack filler (great for repairing a crack in the floor). It needs to be poured about 3/4 inch from the top surface of the floor;
  5. curing the sealant – while the composition will cure, you should not allow cars to move on the floor. You often have to wait 7 days until it is fully cured.

Effectiveness of polyurea for sealing control joints

Joints with concrete can be filled with compositions based on polyurea. This material has several advantages:

  • resistance to moisture;
  • high adhesion to the concrete;
  • the ability to harden even in cold weather.

In addition, polyurea sealants can be used during the sealing of control joints in concrete, even if it is still wet. It has not passed a month to fully cure. The benefit of polyurea is that due to the reasonably decent flexibility of the material can cope with small seasonal or temperature shifts that could provoke new cracks when repairing defects with epoxy.

Peculiarities of crack sealing with polyurethane foam

Professional crack waterproofing can be carried out using polyurethane foam. The composition is injected under high pressure into the defect in this situation. A particular piece of equipment with a pump or a device similar to an automobile grease gun is used for this purpose.

Why it is worth using injection sealant for sealing cracks with polyurethane foam

Polyurethane foam is used in the following situations:

  • It is not necessary to make structural repairs. It is worth sealing cracks from water or air leaks at that time.
  • If the building still needs to give complete shrinkage and shortly may repeat the slight cyclic movement, which can cause cracks. Flexible polyurethane sealant, in this matter, is the best solution.
  • It is necessary to seal a small crack. This material is easier to install and will cost less.
  • You need to make the repair at home. Polyurethane sealant is easier to use than epoxy sealant.
  • If you need to seal a large crack in a foundation wall. Sealants on epoxy can leak out, so it is worth using polyurethane foam.
  • The crack is actively leaking. Polyurethane sealant will adhere perfectly to the surface, providing a quality seal.

Epoxy-based grout for filling cracks in concrete

If the defect is much deeper and more prominent, it is worth using a special sealant based on epoxy resin.

Why use an epoxy-based sealant

Epoxy sealant is worth using in the following situations:

  • You need to make structural repairs. The strength of epoxy is more substantial than concrete. When properly mixed and applied, it will achieve high-quality repairs.
  • A small crack needs to be repaired. Polyurethane foam cannot fill minor defects, which is perfectly coped with by epoxy sealant. If the crack is vast, it is worth taking a composition with high viscosity.
  • It is required to create the smoothest possible surface.

What sealant to choose: polyurethane or epoxy

Many cracks in foundations and floors can be eliminated with the help of polyurethane or epoxy sealant. The epoxy sealant is often suitable for repairing small cracks that polyurethane foam cannot reach. The second option is the best solution for more significant defects.

Hydraulic cement for caulking cracks

Hydraulic cement is a water-resistant cement composition, which can be found on sale in dry form. To prepare it for use, you must mix it with water before the job. It is then applied (or troweled) directly into cracks in foundations and other surfaces.

As for the cost, hydraulic cement is cheaper than other crack repair materials. At the same time, this mixture has a significant disadvantage. It may re-crack as a result of shrinkage of the composition or a slight movement of the structure due to rainfall, soil pressure, and temperature variations. As for the advantages, with the help of hydraulic cement, it is possible to qualitatively seal the crack, even in the case of active considerable water leakage through it.

What tools are needed for the repair of cracks in concrete walls

Sealing cracks in concrete is carried out using a variety of instruments. Before proceeding directly to the case, you need to prepare the following:

  • hammer;
  • chisel;
  • trowel;
  • metal brush;
  • mason’s trowel.

Repairing cracks in concrete in 4 steps

Structural cracks in concrete can lead to severe problems, so you should not ignore them. If you want to patch this effect, here’s a step-by-step guide on how to do it, consisting of 4 simple steps.

No. 1: Choose the right caulking product

Strange as it may seem, the concrete surface is not repaired with concrete. In this situation, particular repair compositions are used: sealants based on epoxy resin, polyurethane foam and other options. Depending on the complexity of the problem, you need to choose the best option.

No. 2: Purchase the necessary tools for repairs

When you have already decided what and how you will repair it, you need to buy all the necessary tools and compounds. You can do this in a construction store.

№ 3: Prepare the crack to be repaired

To prepare a crack for repair, you first need to take a small hammer and chisel to knock down the broken area’s loose, crumbling and cracked concrete. It is also worth digging a little deeper. Afterwards, washing the crack well and cleaning it with a metal brush to remove all the dust is necessary. Note that this process is quite messy and dusty. It would help if you covered the floor with a tarp before cleaning the crack.

No. 4: Caulk the crack with the material of your choice

Next, you can proceed directly to the caulking process. If using epoxy or latex, you should mix the compound according to the manufacturer’s instructions on the label. After using a trowel or trowel, apply the material to the crack, fill it completely, and level the surface. Before using a particular repair compound, it is necessary to read the instructions in detail, how to mix it properly, how to apply it and how long it takes to fully cure. 

Cracks in basement floor

If you notice cracks in outside walls, it can be a real problem because they not only spoil the appearance of the building but can also indicate profound structural changes. In addition, cracks are what spoil the waterproofing of outside walls because water can get inside the wall and the building itself through them. In the worst situation, they can lead to severe problems in the structure of the building. In this article, we will go deeper into the question of what cracks are and how to deal with them. 

Varieties of cracks and what provokes them

Before you perform exterior wall crack repair, it is worth understanding the main varieties of these defects and why they appear. Cracks can occur for several reasons:

  • Settlement of the house or expansion/contraction of building materials under the influence of the environment. 
  • Movement of the foundation of the structure. In this situation, it is worth determining what provoked this to understand how the waterproofing walls exterior can be repaired. 
  • Natural processes. In this situation, it is not worth worrying about. But other more severe problems may put waterproofing exterior cinder block walls at serious risk. 

Vertical cracks

This crack often occurs in the foundation walls, which lack quality support. The main reason there is insufficient support is that the soil under the base of the building is rather poorly compacted and can shrink under load or even be washed away by groundwater. 

Stepped cracks

The cause of step cracks in mortar joints in the area of corners of buildings. They are most often caused by the movement of the walls due to shifts in the foundation of the building, particularly foundation subsidence. 

Horizontal cracks

The main reason for the appearance of horizontal cracks is the corrosion of wall ties. But this situation is not a reason for despair. Modern specialists can replace corroded connections in the walls and fix the problem without significant damage to homeowners. 

What means are used to seal cracks in the walls

A variety of compounds can be used to seal cracks. On sale, you can find complete sets of spiral rods, special mortar, a spatula for mixing the components, and a gun for delivering the mortar with various nozzles, trowels and other details. You need to know precisely what you need and be able to use the kit at all stages of sealing defects on the wall’s surface. 

How to get rid of cracks forever: the rules of caulking forever

Sealing exterior wall cracks may be required on surfaces in the house of various materials. Most often, the repair is needed on the following types of walls. 

Sealing cracks in a brick wall

If you want to remove a crack on the surface of a brick wall, you first need to remove the cracked mortar. In this situation, you should use a special scraper. At the same time, it is worth not damaging the bricks themselves. In this situation, you should use a chisel and hammer during the work. 

After removing the mortar, the brick wall should be sprayed with water. After that, a new mortar is applied to the joints. Next, it is worth using water on the brick wall again to smooth out the applied mortar. 

The process of sealing cracks in a concrete wall

Sealing concrete walls outside involves an excellent surface. Sealing cracks in concrete walls can be done with a liquid or paste-like elastomeric substance. It must be applied to the crack from a special tank or pressed into the defect with a spatula.

You should use latex-based paint if the crack is small – 1/2 inch wide and 1/4 inch deep. It is a relatively simple method of exterior waterproofing solutions, which you can do yourself. The primary purpose of these actions is to prevent water from seeping through the walls. In addition, this method will minimize the likelihood of the edges of the crack chipping and cracking the defect. 

In addition, structural sealing of concrete cracks in the walls also occurs with the help of epoxy resin injections. 

The most effective way to seal cracks: is epoxy injection

The best waterproofing for exterior walls is to fill cracks with an infusion of a particular substance based on epoxy resin. This method of sealing cracks involves the following steps. 

Step 1: Clean the work area

First, it is worth removing the remains of concrete mortar from the crack and painting or cleaning it from the old putty. For this process, it is worth using a wire brush. After that, you should use a vacuum cleaner to remove debris and dust.

Step 2: Align the injection points with nails

The next step is to hammer in 3-inch finish nails (10d) 12 inches apart. These will align the mortar injection points along the crack. 

Step 3: Prepare the crack-sealing material

After that, you need to prepare water seal for the exterior walls. To do this, open two containers of epoxy crack sealant and fill equal amounts of A and B compounds. It is worth using two different sticks to avoid contaminating the containers with the compositions. In this situation, mixing the two parts on a particular board using a clean putty knife is worth mixing. It is necessary to mix until there is a homogeneous grey colour in the mixture. 

Step 4: Apply the sealant to the base

For the exterior block wall waterproofing to be done as well as possible, you need to apply a small amount of sealant to the base of one of the plastic injection ports, making sure not to plug the hole itself. After that, you need to put the port on one of the nails peeking out of the crack. Then it would help if you pressed them to the wall. A similar principle should be done with the other ports. 

Step 5: Mix the epoxy sealant and apply it

After mixing some epoxy sealant, you should apply it to the surface of the entire crack using a putty knife. It should be ½ inch wide. You should then spread the sealant on each side of the crack by 1/8 inch and 1 inch. Next, you should cover the cracks with sealant over the surface of the entire flange, leaving only the wide part of the neck. Next, you should take a brush to work the edges and soak it in mineral spirits. 

If you can look, look at the back of the wall. If the crack is through, you should also treat it with sealant there. It should then cure for 6-10 hours before injecting the epoxy. 

Step 6: Treat the crack with epoxy

Using the tanking systems for external walls, you should mix the LCR epoxy using the plunger piston from the kit. After that, place the LCR cartridge in the gun to inject the mortar. Apply the mortar into the crack, moving from the bottom to the top.

Step 7: Fill the joints all the way

Squeeze the trigger repeatedly until the epoxy comes out of the hole. Next, it’s worth removing the gun and plugging in the newly filled port. Then put the tip of the cartridge in the spot that is leaking and pull the gun’s trigger, filling it with epoxy. It should be done with all the ports. 

Step 8: Smooth the ports.

The mortar should be left to dry for five days. Next, it is worth cutting off the necks with a hacksaw. You can also patch these cut-off ports with crack sealant. 

Facade Trim

If you are faced with cracks appearing on the structure’s facade, waterproofing the house’s exterior walls does not suffer. If the problem is in the finishing, it is enough to patch up the defects with plaster and other materials for finishing the facade. If the problem is more profound and concerns the structural changes in the building, you should take more responsibility for the defect elimination process.

Suppose you need quality waterproofing exterior crawl space walls and other rooms in the house. In that case, you should contact real professionals who will carefully inspect the home and fix all the defects.

Leak and crack in walls outside

If you notice cracks in outside walls, it can be a real problem because they not only spoil the appearance of the building but can also indicate profound structural changes. In addition, cracks are what spoil the waterproofing of outside walls because water can get inside the wall and the building itself through them. In the worst situation, they can lead to severe problems in the structure of the building. In this article, we will go deeper into the question of what cracks are and how to deal with them. 

Varieties of cracks and what provokes them

Before you perform exterior wall crack repair, it is worth understanding the main varieties of these defects and why they appear. Cracks can occur for several reasons:

  • Settlement of the house or expansion/contraction of building materials under the influence of the environment. 
  • Movement of the foundation of the structure. In this situation, it is worth determining what provoked this to understand how the waterproofing walls exterior can be repaired. 
  • Natural processes. In this situation, it is not worth worrying about. But other more severe problems may put waterproofing exterior cinder block walls at serious risk. 

Vertical cracks

This crack often occurs in the foundation walls, which lack quality support. The main reason there is insufficient support is that the soil under the base of the building is rather poorly compacted and can shrink under load or even be washed away by groundwater. 

Stepped cracks

The cause of step cracks in mortar joints in the area of corners of buildings. They are most often caused by the movement of the walls due to shifts in the foundation of the building, particularly foundation subsidence. 

Horizontal cracks

The main reason for the appearance of horizontal cracks is the corrosion of wall ties. But this situation is not a reason for despair. Modern specialists can replace corroded connections in the walls and fix the problem without significant damage to homeowners. 

What means are used to seal cracks in the walls

A variety of compounds can be used to seal cracks. On sale, you can find complete sets of spiral rods, special mortar, a spatula for mixing the components, and a gun for delivering the mortar with various nozzles, trowels and other details. You need to know precisely what you need and be able to use the kit at all stages of sealing defects on the wall’s surface. 

How to get rid of cracks forever: the rules of caulking forever

Sealing exterior wall cracks may be required on surfaces in the house of various materials. Most often, the repair is needed on the following types of walls. 

Sealing cracks in a brick wall

If you want to remove a crack on the surface of a brick wall, you first need to remove the cracked mortar. In this situation, you should use a special scraper. At the same time, it is worth not damaging the bricks themselves. In this situation, you should use a chisel and hammer during the work. 

After removing the mortar, the brick wall should be sprayed with water. After that, a new mortar is applied to the joints. Next, it is worth using water on the brick wall again to smooth out the applied mortar. 

The process of sealing cracks in a concrete wall

Sealing concrete walls outside involves an excellent surface. Sealing cracks in concrete walls can be done with a liquid or paste-like elastomeric substance. It must be applied to the crack from a special tank or pressed into the defect with a spatula.

You should use latex-based paint if the crack is small – 1/2 inch wide and 1/4 inch deep. It is a relatively simple method of exterior waterproofing solutions, which you can do yourself. The primary purpose of these actions is to prevent water from seeping through the walls. In addition, this method will minimize the likelihood of the edges of the crack chipping and cracking the defect. 

In addition, structural sealing of concrete cracks in the walls also occurs with the help of epoxy resin injections. 

The most effective way to seal cracks: is epoxy injection

The best waterproofing for exterior walls is to fill cracks with an infusion of a particular substance based on epoxy resin. This method of sealing cracks involves the following steps. 

Step 1: Clean the work area

First, it is worth removing the remains of concrete mortar from the crack and painting or cleaning it from the old putty. For this process, it is worth using a wire brush. After that, you should use a vacuum cleaner to remove debris and dust.

Step 2: Align the injection points with nails

The next step is to hammer in 3-inch finish nails (10d) 12 inches apart. These will align the mortar injection points along the crack. 

Step 3: Prepare the crack-sealing material

After that, you need to prepare water seal for the exterior walls. To do this, open two containers of epoxy crack sealant and fill equal amounts of A and B compounds. It is worth using two different sticks to avoid contaminating the containers with the compositions. In this situation, mixing the two parts on a particular board using a clean putty knife is worth mixing. It is necessary to mix until there is a homogeneous grey colour in the mixture. 

Step 4: Apply the sealant to the base

For the exterior block wall waterproofing to be done as well as possible, you need to apply a small amount of sealant to the base of one of the plastic injection ports, making sure not to plug the hole itself. After that, you need to put the port on one of the nails peeking out of the crack. Then it would help if you pressed them to the wall. A similar principle should be done with the other ports. 

Step 5: Mix the epoxy sealant and apply it

After mixing some epoxy sealant, you should apply it to the surface of the entire crack using a putty knife. It should be ½ inch wide. You should then spread the sealant on each side of the crack by 1/8 inch and 1 inch. Next, you should cover the cracks with sealant over the surface of the entire flange, leaving only the wide part of the neck. Next, you should take a brush to work the edges and soak it in mineral spirits. 

If you can look, look at the back of the wall. If the crack is through, you should also treat it with sealant there. It should then cure for 6-10 hours before injecting the epoxy. 

Step 6: Treat the crack with epoxy

Using the tanking systems for external walls, you should mix the LCR epoxy using the plunger piston from the kit. After that, place the LCR cartridge in the gun to inject the mortar. Apply the mortar into the crack, moving from the bottom to the top.

Step 7: Fill the joints all the way

Squeeze the trigger repeatedly until the epoxy comes out of the hole. Next, it’s worth removing the gun and plugging in the newly filled port. Then put the tip of the cartridge in the spot that is leaking and pull the gun’s trigger, filling it with epoxy. It should be done with all the ports. 

Step 8: Smooth the ports

The mortar should be left to dry for five days. Next, it is worth cutting off the necks with a hacksaw. You can also patch these cut-off ports with crack sealant. 

Facade Trim

If you are faced with cracks appearing on the structure’s facade, waterproofing the house’s exterior walls does not suffer. If the problem is in the finishing, it is enough to patch up the defects with plaster and other materials for finishing the facade. If the problem is more profound and concerns the structural changes in the building, you should take more responsibility for the defect elimination process.

Suppose you need quality waterproofing exterior crawl space walls and other rooms in the house. In that case, you should contact real professionals who will carefully inspect the home and fix all the defects.